Morris

documentation


1) Download the theme from themeforest.net

2) Go to Wordpress Admin Panel -> Appearance -> Themes. Click “Add new”, then upload archive theme

3) Click "Activate theme" then click “Begin activating plugins”


4) Activate all required plugins. morris plugin It must be activated for correct work of the theme

5) Import demo data. Go to "Appearance"->Import demo data and click "Import".  Note: Sometimes after this step some   plugins may be deactivated, just enable they again.   


6) Go settings->permalinks and click “Save”


To work correctly, you must activate all required plugins (Follow instructions after activate theme) and add spetial pages (or just import demo data):


You can edit the page in the backend and in the frotend via visual composer.

1) Click edit page 


2) Edit custom section


3) in panel 'Background options / Design options ' you can specify a background image for the section and also some ccs


1) Go to WordPress Admin Panel -> Customizing -> Logo

2) Click  "Select image" and select image for logo


3) Press save button 

4) also you can insert text logo 


1) Go to WordPress Admin Panel -> Customize ->  Social networks

2) insert url social networking

 3)  you can also insert other social networks, for this add shortcode to textarea "Insert Social shortcode or another" shortcode [morris_social_links url="https://pinterest.com/" class="fa fa-pinterest"] in params url your custom url, in param class use your custom class like "fa fa-pinterest"


1) Go to WordPress  Admin Panel -> Customizing ->  Colors 

2) Select color  for some elements 


How to change the position of sidebar

1) Go to WordPress Admin Panel -> Customizing ->  Blog settings Location sidebar 


How to  Limit word in post blog list


Go to WordPress Admin Panel -> Customizing -> Blog settings  -> Blog list

also here you can select blog type


1) Go to WordPress Admin Panel -> Customizing -> Performance


1) Go to WordPress Admin Panel -> Customizing -> 404 

And here you can change header image text url etc.

We use contact form 7 


Setting Up Mail

Contact Form 7 allows you to edit mail templates very flexibly. You are able to edit not only the message body, but also message header fields. And you can manage HTML mail as well. In this article, I’ll show you the settings for each field and explain how to set up your mail with these settings.


Fields in the Mail tab panel

You can edit mail templates in the Mail tab panel.
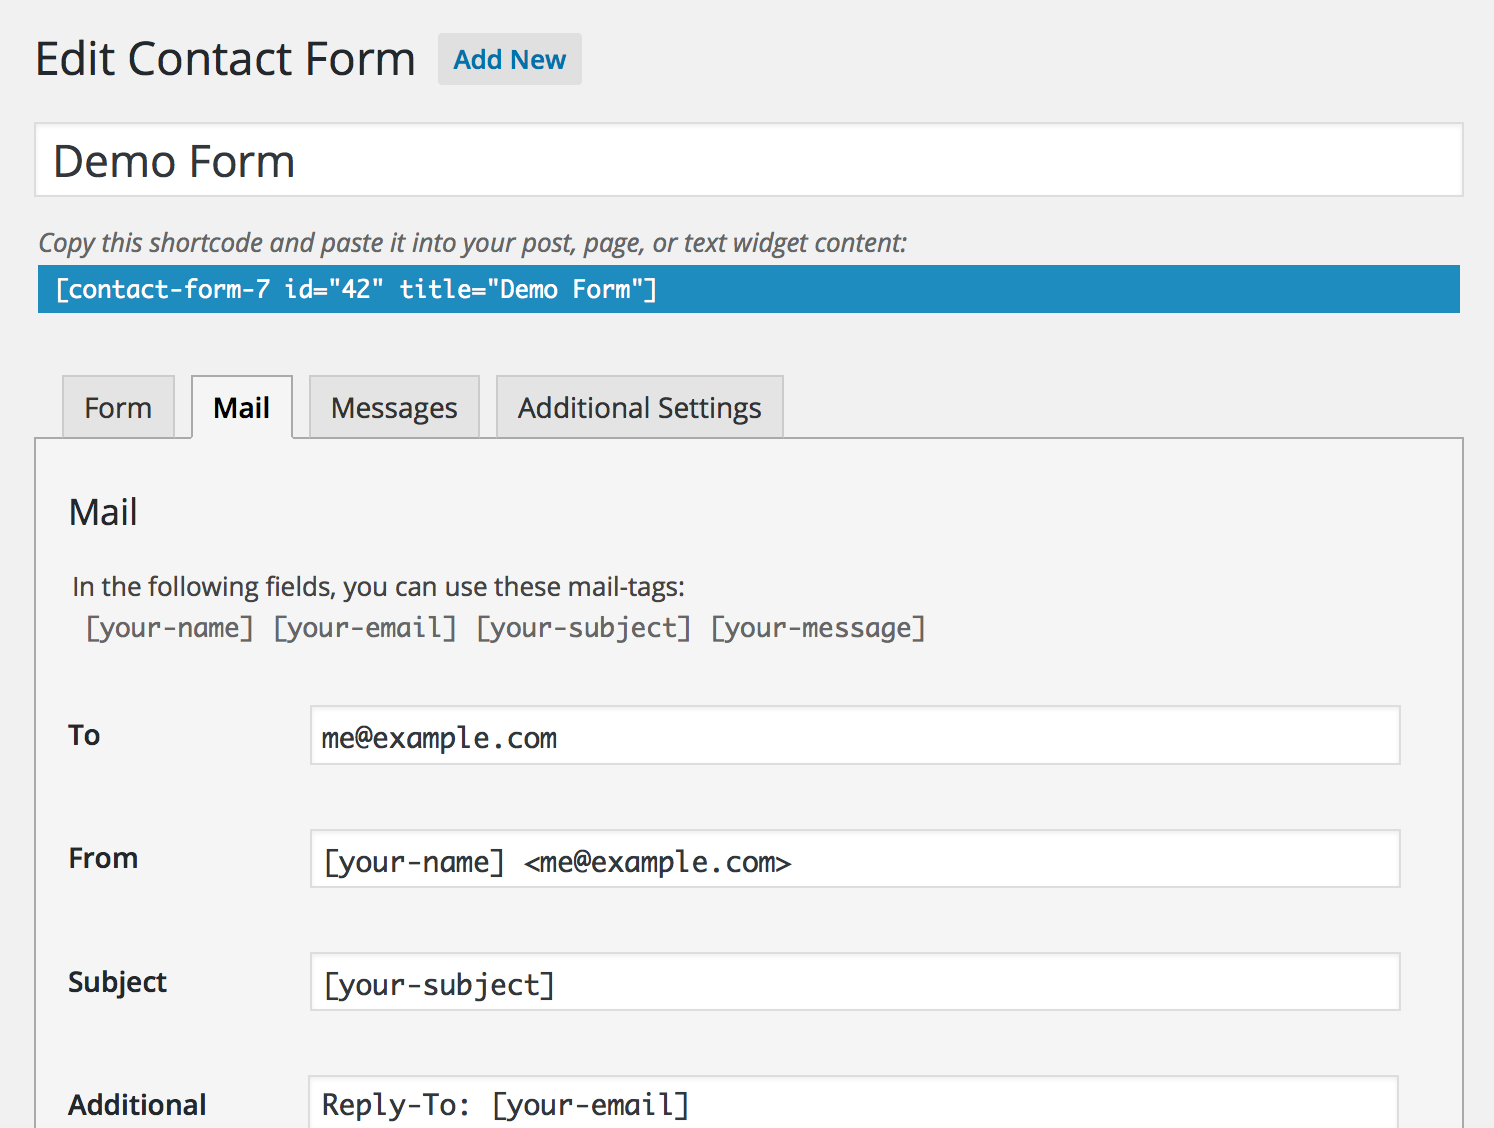
Screenshot image of the mail tab

Basic header fields (ToFrom and Subject)

These are basic and necessary message header fields; and you can embed mail-tags anywhere in these fields.

Additional headers

You can insert additional message header fields here, such as Cc and Bcc. There should be one field per line. You can embed mail-tags anywhere in these fields.

Message body

This is the message body; you can embed mail-tags anywhere in this field.

If you check Exclude lines with blank mail-tags from output box, lines including mail-tags that have empty values will be excluded from the message body of the actual mail output.

By default, plain text is used for the message body. To use HTML, check Use HTML content type box.

File attachments

If you attach uploaded files to this mail, put mail-tags for the uploaded files into this field. You can also attach files from the server (local file attachment).

Mail (2)

Mail (2) is an additional mail template. It is often used as an autoresponder, but you can use it for any purpose. Mail (2) is sent only when the primary Mail has been sent successfully.

If You Have Email Problems

NOTE: Sending Emails from Contact Form 7 works flawlessly, without any effort, for most people — but not for everyone.

Though the plugin successfully sends millions of emails every day, there are a host of issues that can delay or stop emails on both the sending and receiving ends of a typical email.

The important point to note is that the sending and receiving of emails depends heavily on both the server where your WordPress installation is hosted and the email configuration of the local computer where the emails are supposed to be received.


Q: How to find the version of the theme

A: Go to wp-admin Appearance-> Themes click on virgo in the pop-up window you can see the version theme 


Q: How update theme?

A: try this plugin https://github.com/envato/envato-wordpress-toolkit or replace via ftp folder /wp-content/themes/felix/ and update newsagency_plugin in folder /wp-content/plugins/morris-plugin

Q: How update plugins?

A: Go to wp-admin click 'Begin updating plugins', to update the paid plugins like VC delete this plugin and inst and install them as in theme installation


Q: how to get the licensing keys for the  visual composer ?

A: To work properly licensing keys Not needed, they are only required for auto-update these plugins.

All new versions this plugins we will deliver with morris theme